Overview
In this lesson, you'll learn how to use the start file.
Step One - Specify the file name
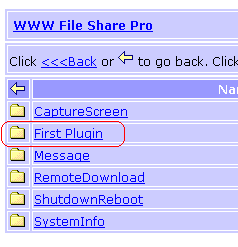
In lesson 1, you've already created a plugin - "First
Plugin". Let's modify the setting file again:
Enable=True
StartFile=test.bat
ReturnFile=dir.txt
RunOnce=False
DisplayName=First Plugin
User= |
Step Two - Create the .bat file
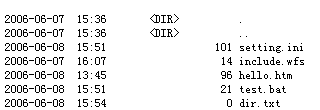
Now please create a new .bat file - "test.bat",
by any text editor, and save it into the directory "First
Plugin".

Then type following code into "test.bat".
Step Three - Test the plugin
Please run WWW File Share Pro and open a browser to visit
"First Plugin" again.

Click on "First Plugin". This time you will see:

Now it's time to explain how the plugin works:

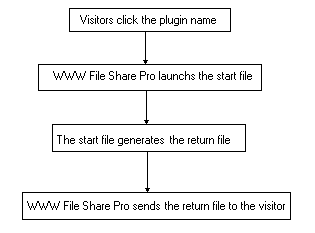
- The start file is a executable file for WWW File Share
Pro to launch when a visitor clicks the name of the plugin.
- Normally the start file will write a file to the disk
(the return file) for WWW File Share Pro to send to the
visitor.
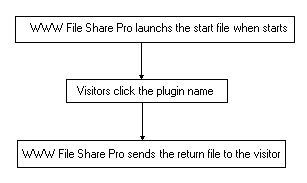
- If RunOnce=True. WWW File Share Pro will only launch
the start file once time when the file-sharing service starts.
When a visitor clicks the name of the plugin, WWW File Share
Pro will not launch the start file again but will directly
send the return file to the visitor.

Summary
At the conclusion of this lesson, you should be able to
do the following:
- Modify the setting file to set the start file.
- How to write a simple start file.
- How to set "RunOnce".
|

