Overview
The goal of this lesson is help you to become familiar
with the plugin system, and for you to write a simple plugin
that displays the message "Hello world!".
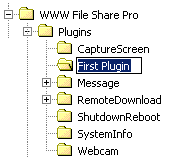
Step One - Create a directory
Let's open windows explorer (by clicking Start, Programs,
Windows Explorer) and create a sub directory "First Plugin"
under the main directory or the plugin system.
Step Two - Create a setting file
Once you've created a plugin directory, you can begin to
write your first plugin.
Now please create a new setting file - "setting.ini",
by any text editor, and save it into the directory "First
Plugin".
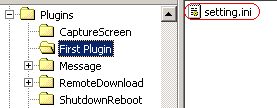
Then type following code into "setting.ini".
Enable=True
StartFile=
ReturnFile=include.wfs
RunOnce=False
DisplayName=First Plugin
User= |
Don't worry if you're a little unsure about what the code
does. We'll explain the code line by line.
1: Enable=True
This line states that the plugin is enabled.
2: StartFile=
This line declares the file name that will be run when
a visitor clicks the directory name of the plugin. The First
Plugin is very simply and it doesn't need to run a start
file. So please do not set the file name.
3: ReturnFile=include.wfs
All plugins should have a return file. You must declare
the return file for WWW File Share Pro to return to the
visitor.
4: RunOnce=False
This line states that if the start file should be run every
time then visitor access the plugin directory. Normally
it should be False. If RunOnce=True, the start file will
only be run one time when the file-sharing service starts
and WWW File Share Pro will try to terminate the process
of the start file when the file-sharing service stops.
5: DisplayName=First Plugin
This line declares the plugin name that displays on the
"Plugins" panel.
6: User=
This line declares the user name that is allowed to access
the plugin. Normally this parameter is controlled by WWW
File Share Pro so you do not have to set it.
Step Three - Create a return file
Now please create another file - "include.wfs",
by any text editor, and save it into the same directory "First
Plugin".
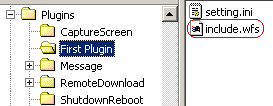
Then type following code into "include.wfs".
That's all!
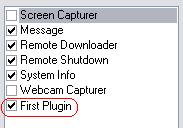
Step Four - Test the plugin
Please run WWW File Share Pro and open a browser to visit
the website. Enter the main directory of the plugin system
you will see the new plugin name "First Plugin".
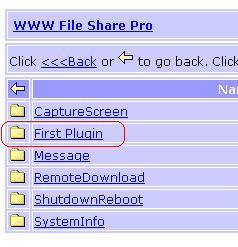
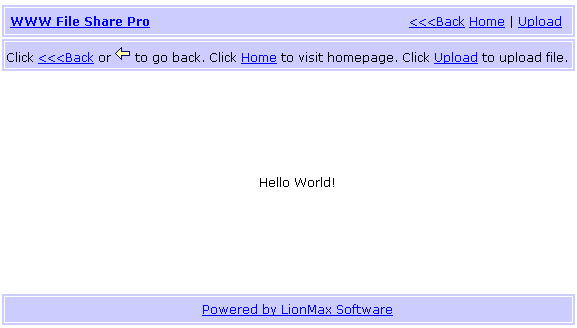
Click on "First Plugin" you will see:
Summary
At the conclusion of this lesson, you should be able to
do the following:
- Create a new plugin.
- Add setting file to your plugin.
- Config the setting file.
- Add return file to your plugin.
- Write output message for the visitor.
- Test your plugin.
|
